
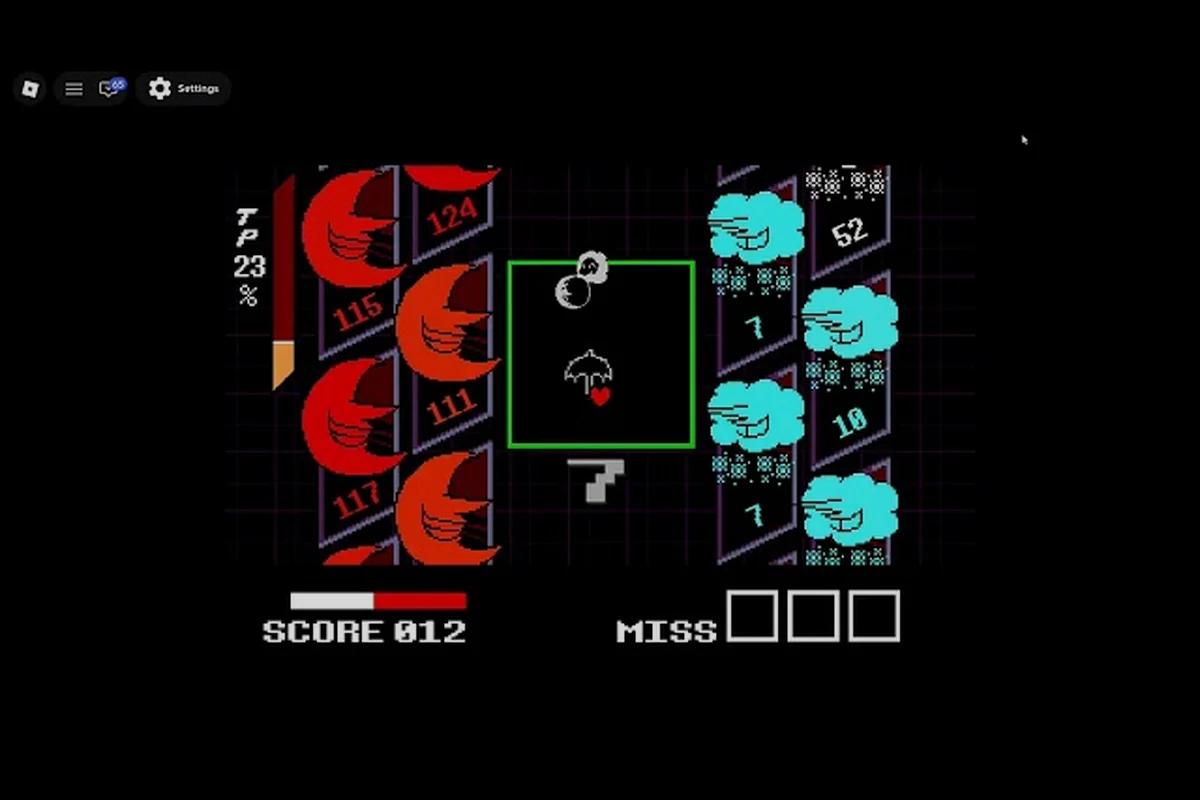
Landing DELTARUNE Fight critical hits consistently changes how every boss encounter feels, because a well-timed strike interrupts pressure instead of just trading damage. The core loop asks you to steer the Soul through dense bullet spreads, read attack windups, and commit to offense only inside narrow windows that community videos show are telegraphed well in advance. Players who chase raw aggression without respecting those windows burn through their health pool quickly, while players who wait too long lose the openings that make no-hit runs possible. This guide breaks down timing, block cues, hitbox behavior, and the habits that separate clean clears from messy survival.
Understanding Critical Hit Timing Windows
The timing system in DELTARUNE Fight rewards players who treat every boss phase as a conversation rather than a race. According to community videos, the confirmed line-up so far includes Tenna, King, Pink, and Kaizo Knight, and each one uses attack patterns that alternate between pressure and recovery. A critical hit lands when your strike connects during the recovery beat, not during the active threat, which means the skill is in recognizing the exact moment a boss stops attacking and starts resetting.
Reading Windup Cues Before Striking
Every boss telegraphs its attacks through movement and visual tells that appear before the bullet phase begins. The screen-wide sweep starts with a slow pull-back, the tracking volley begins with a brief pause in the boss's idle animation, and the final phase often shifts the arena's color or layout before launching its hardest patterns. Players who watch for these cues can position the Soul near the safe edge of the arena while the attack is still winding up, then move inward the instant the pattern ends.
| Boss | Common Windup Cue | Recovery Signal | Best Strike Window |
|---|---|---|---|
| Tenna | Screen flicker before volleys | Attack pattern pauses briefly | Right after the volley clears |
| King | Wide arm raise before sweeps | Boss lowers arms and steps back | During the step-back animation |
| Pink | Rapid repositioning before bursts | Boss stands still for a beat | The stillness after a burst |
| Kaizo Knight | Weapon glow before heavy swings | Glow fades and stance resets | Immediately after the glow fades |
The table above reflects patterns reported by players across community videos, not official documentation, because the developer publishes no mechanic numbers anywhere. What matters is the rhythm: windup, active threat, recovery, repeat. Committing to offense during the active threat is how runs end early, while waiting for the recovery beat is how critical hits become reliable.
Why Early Strikes Fail More Often
An early strike usually whiffs or gets punished because the boss's hitbox is still in its active state. Community footage of first-attempt Tenna fights shows players swinging during the tracking volley and taking damage from projectiles that were already in flight, which means the strike animation locked them in place at the worst possible moment. The lesson is that attack timing in DELTARUNE Fight is defensive first: you strike when the boss cannot hit back, not when you feel like pressing the button.
Block Rules and Damage Avoidance Fundamentals
Blocking in DELTARUNE Fight is not a passive shield that absorbs everything. According to player reports, the block input reduces incoming damage during certain attack phases, but it also slows your movement and can trap the Soul against arena walls if used at the wrong time. Understanding how to block effectively means knowing which attacks are blockable, which ones demand movement, and when blocking is actually a trap.
Which Attacks You Should Block Versus Dodge
The distinction between blockable and unblockable attacks is one of the most important reads in the game. Community videos suggest that wide, high-damage swings can be blocked to reduce their impact, while tracking volleys and screen-wide sweeps are better handled by repositioning the Soul to a safe zone. Blocking a volley often still lets several projectiles connect, which makes the block feel worse than simply moving out of the pattern's path.
| Attack Type | Block Behavior | Better Response | Why |
|---|---|---|---|
| Heavy swing | Reduces damage taken | Block if cornered | Keeps you alive through the hit |
| Tracking volley | Partial mitigation only | Reposition early | Avoids chip damage stacking |
| Screen-wide sweep | Minimal mitigation | Move to safe edge | Sweep covers most of the arena |
| Burst pattern | Unreliable mitigation | Weave between gaps | Gaps are wider than they look |
The key habit is to treat blocking as a fallback, not a primary strategy. When you learn how to avoid damage through movement first, blocking becomes a tool for recovering from positioning mistakes rather than a crutch that hides bad reads.
Positioning the Soul for Clean Escapes
The Soul moves faster than most players expect, which means the safest position is usually near the arena's edge where bullet density is lower. Community videos of Kaizo Knight attempts show players hugging the outer ring during the weapon-glow phase, then darting inward to strike during the recovery beat. This rhythm of edge-to-center movement keeps the Soul out of the densest bullet clusters while preserving the option to commit when the window opens.
The broader combat system is covered in the DELTARUNE Fight combat guide, which explains how parry timing and the battle flow interact with the positioning habits described here. Positioning and timing are the same skill viewed from two angles: you position to survive the active threat, then you time the strike to punish the recovery.
Hitbox Behavior and No-Hit Run Discipline
A no-hit run in DELTARUNE Fight is less about perfect reflexes and more about understanding how hitboxes behave during each attack. According to community videos, the Soul's hurtbox is smaller than its visual size, which means bullets that look like they should connect sometimes pass harmlessly through the edges. Learning this hitbox guide lets you thread through patterns that initially seem impossible.
The Gap Between Visual Size and Actual Hurtbox
The Soul's visual heart shape is larger than the actual hurtbox that registers damage, a detail that players report after repeated attempts at Tenna and Pink. When a bullet grazes the outer edge of the heart, the game often counts it as a miss, which means aggressive positioning is safer than it appears. The same principle applies to boss attacks: the screen-wide sweep has a visual trail that extends beyond its damaging area, so standing just outside the visual edge is frequently safe.
| Element | Visual Appearance | Actual Threat | Player Implication |
|---|---|---|---|
| Soul hurtbox | Full heart shape | Smaller core region | Grazes often miss |
| Sweep trail | Wide glowing arc | Narrower damage zone | Edge positioning works |
| Volley bullets | Large glowing orbs | Smaller collision core | Weaving is more forgiving |
| Boss strike | Full weapon arc | Active hitbox only at peak | Early dodges still work |
This gap between visuals and hitboxes is why no-hit runs are achievable even against the hardest tier. Players who internalize the smaller hurtbox stop overcorrecting and start moving with confidence, which reduces the panic dodges that cause most hits.
Building a No-Hit Run Habit Loop
The discipline of a no-hit run comes from a repeatable loop: observe the windup, move to the safe zone, wait for the recovery beat, strike once or twice, then reset to the edge. Community footage of successful Genocide difficulty attempts shows players spending most of the fight in motion, committing to offense only during the brief windows where the boss is visibly resetting. This loop is covered in more depth in the DELTARUNE Fight attack guide, which breaks down bullet patterns and healing windows that complement the hitbox awareness here.
Attack Timing Across Difficulty Tiers
The difficulty tier names Standard, Brutal, and Genocide are community-reported, and each one changes how attack timing works in practice. According to player reports, higher tiers compress the recovery windows, add more projectiles to each volley, and make the final phase of each boss significantly longer. The same timing principles apply, but the margin for error shrinks dramatically.
How Brutal and Genocide Change the Rhythm
On Standard, the recovery beats are generous enough that players can strike twice before the next windup begins. On Brutal, that window shrinks to a single clean strike, and on Genocide, players report that some recovery beats are so short that committing at all feels risky. The solution is not to strike faster but to strike earlier in the recovery animation, the instant the boss's active threat ends.
| Difficulty Tier | Recovery Window Feel | Strike Commitment | Positioning Demand |
|---|---|---|---|
| Standard | Generous and readable | Two strikes possible | Forgiving edge zones |
| Brutal | Tighter but consistent | One clean strike | Must pre-position early |
| Genocide | Very short windows | Strike instantly or skip | Constant edge-to-center motion |
The table reflects qualitative player reports rather than official numbers, because the developer has never published frame data or damage values. What matters is the pattern: higher tiers reward players who already have the timing loop internalized, not players who try to react faster on the fly.
Adapting Your Strike Rhythm Per Boss
Each confirmed boss has a slightly different recovery signature, which means your strike rhythm should shift between encounters. King steps back visibly after his sweeps, giving a clear visual cue. Pink stands still for a beat after her bursts, which is easy to read once you know to look for it. Kaizo Knight drops his weapon glow, and Tenna pauses his volley pattern. Learning these signatures is the difference between a clean clear and a run that ends in the final phase.
Spare Logic and When to Skip the Fight
The question of how to spare in DELTARUNE Fight is complicated by the fact that this Roblox game is a boss rush combat simulator, not a story-driven adventure with mercy menus. According to community videos, the game does not feature the SPARE or MERCY menu systems from the original Deltarune, which means sparing is not a menu option in the traditional sense. Instead, players report that some encounters allow you to skip a final attack segment by meeting certain conditions during the fight.
What Sparing Actually Means Here
In the original Deltarune, Kris, Susie, Ralsei, and Noelle could choose to spare enemies through a dedicated menu, but this Roblox game does not confirm those characters as playable fighters and does not replicate that menu system. What community videos do show is that Rude Buster can skip a final attack segment in certain fights, which functions as a form of sparing: you end the encounter without taking the full damage load of the closing phase. This is the closest equivalent to a spare mechanic, and it is tied to your attack timing rather than a menu choice.
| Original Deltarune Concept | DELTARUNE Fight Equivalent | Confirmed? |
|---|---|---|
| SPARE menu | Not present in this game | Confirmed absent |
| MERCY option | Not a menu choice | Confirmed absent |
| Ending fights peacefully | Skipping final attack via Rude Buster | Community-reported |
| Party member actions | Not confirmed as playable | Unconfirmed |
The distinction matters because players coming from the original game often look for a mercy system that does not exist here. Instead, the skill expression is in using Rude Buster at the right moment to skip the hardest segment of a fight, which is a timing decision rather than a moral one.
Using Rude Buster to Skip Final Phases
Community videos show that Rude Buster is the only named attack in the game, and it can skip a final attack segment when timed correctly. The window for this skip appears during the transition into the final phase, and players report that committing the TP at that moment prevents the hardest pattern from ever launching. This is the highest-value timing read in the game, because it converts a difficult survival sequence into a clean finish. The DELTARUNE Fight action commands guide explains how TP spending and attack selection interact with the timing windows described here.
Frequently Asked Questions
How do I land critical hits consistently in DELTARUNE Fight?
Critical hits land when you strike during the boss's recovery beat, not during the active threat. Watch for windup cues like weapon glows or screen flickers, then commit the instant the attack pattern ends. Community videos show that striking during the recovery animation is far more reliable than reacting mid-pattern.
What is the best way to avoid damage against Tenna?
Position the Soul near the arena's edge during Tenna's volley phases, because bullet density is lower there. Wait for the volley to clear, then move inward to strike during the pause. According to community videos, the tracking volley punishes players who stay center-screen, while edge positioning keeps the hurtbox out of the densest clusters.
Can I block every attack in DELTARUNE Fight?
No. Blocking reduces damage from heavy swings but provides only partial mitigation against tracking volleys and screen-wide sweeps. Players report that movement is the better response to most patterns, with blocking reserved for moments when you are cornered and cannot reposition in time.
Is a no-hit run possible on Genocide difficulty?
Yes, according to community videos, but it requires internalizing the smaller Soul hurtbox and committing only during very short recovery windows. The key is striking instantly when the boss's active threat ends, then resetting to the edge before the next windup begins. Patience matters more than raw speed.
Does DELTARUNE Fight have a spare or mercy system?
No. This Roblox game does not include the SPARE or MERCY menu systems from the original Deltarune. The closest equivalent is using Rude Buster to skip a final attack segment, which community videos show can end certain fights before the hardest phase launches. It is a timing decision, not a menu choice.